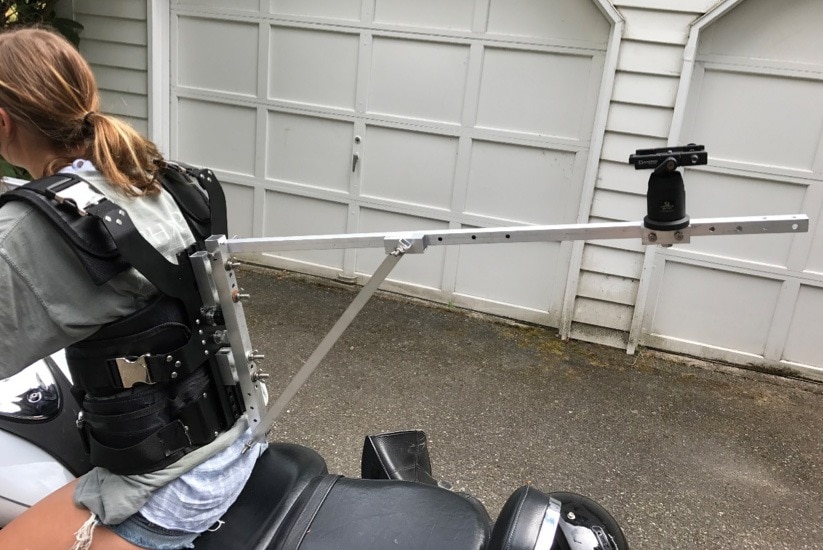
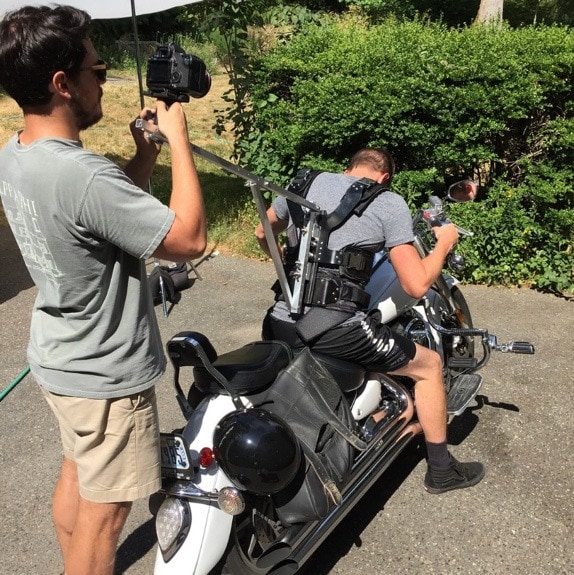
A DIY Snorri rig that is sturdy enough for a lot of different camera payloads and movements. The goal here was to build a rig that a subject could use while riding a motorcycle. We wanted the rig to be rigid, with as little wiggle as possible to allow the rider full freedom to operate the motorcycle like he or she normally would.
- ¾” Square Aluminum Tubing
- 1” Square Aluminum Tubing
- Hex bolts
- Crush washers to match bolt size
- Wing nuts to match bolt size
- Flat spacers to match bolt size
- Thick plastic spacers
- Vest is from a steady cam rig
- Other DIY vests I’ve seen: Drum Carrier, Plate Carrier Vest, Plywood and Rope, PVC Tubing (You can also rig the vest to wrap around the subjects stomach instead of over the shoulders)
- Ball/Std Head for camera mounting
- Screw Driver or Drill Press
- Set of drill bits
- Hacksaw for cutting aluminum
- Tape measure
- Wrenches
- Rubber/ Plastic mallet
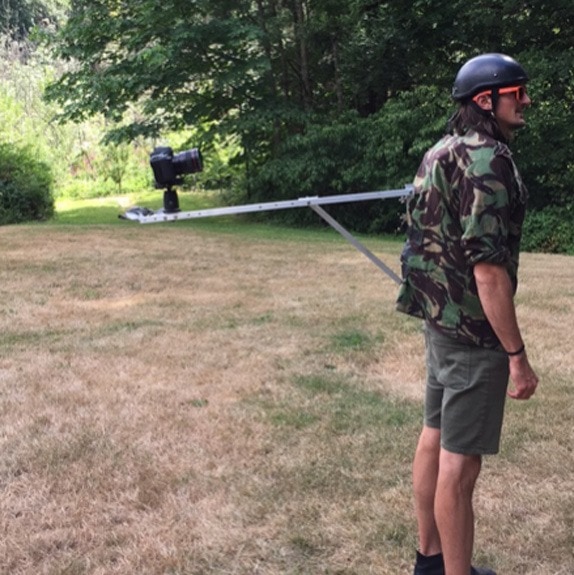
I first used a hack saw to cut tubing to size, you can play with a lot of different lengths and angles here. What I found to work best was to keep your base angles shorter and more compact. When the camera gets cantilevered too far out it tends to wag left and right when the subject moves. The point of this rig is to keep a tight and focused gaze on the subject so keep the footprint of your rig smaller if possible.
Second you need to figure out how you are going to bolt the base of the rig to your vest. I used a vest from a Steadi Cam we had laying around that had some pre-drilled holes on the front for adjustments. Next was drilling all the mounting and adjustment holes I used to assemble the rig. Make sure you drill extra adjustment holes at all your mounting and connection points, this gives more room to play with different angles of the main bar the camera will eventually connect to. Having more adjustment holes is crucial to making the rig more versatile and give yourself some options when shooting. The last major piece was a small chunk of aluminum mounted to the end of the Snorri to mount your camera head too, I used a ball head that could be tightened to give me the option to change where the camera was focused on the subject.
If you really want to take it to the next level, you can add a cantilever to the back (or front depending on which orientation you plan to use it) of your vest to fight the weight of the camera. This would be done by adding some extra tubing and weight to the back of the vest to create a more balanced rig.